xDrip » Features » xDrip & Dexcom » Dexcom G7, One+ or Stelo
This guide explains how to use xDrip to collect directly from G7, One+, or Stelo.
Before inserting a new sensor, use a pen to mark the old one to avoid accidentally removing the wrong sensor later.
Inspect the sensor for any damage, then follow the manufacturer’s instructions to insert it using the applicator.
The session will start automatically once the sensor is inserted—no need to manually stop or start anything.
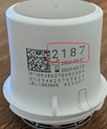
Take note of the 4-digit pairing code displayed on the sensor applicator, as you’ll need it to establish connectivity later.
1- Only one app can collect from the transmitter at any time. If you have installed the Dexcom app or any other app that collects data from the transmitter, uninstall it. Do not start your Dexcom receiver (or a pump that gets readings directly from G7) yet. If they are already running, disable them and wait 15 minutes.
2- Go to Android Settings −> Connected devices.
Forget all devices named DXCM**, DX01** or DX02**, where ** represents any two characters.
3- Ensure xDrip is updated to at least the 2026.06.17 release.
4- Set up xDrip and your phone as explained here. Be sure to review and confirm all settings, as the QR code doesn’t configure them automatically.
5- Ensure your old sensors are out of range or place them in a microwave. If your old sensor is still working, it’s okay as long as it’s connected to another instance of xDrip or Dexcom app. If you’re done with it, peel it off and move it away.
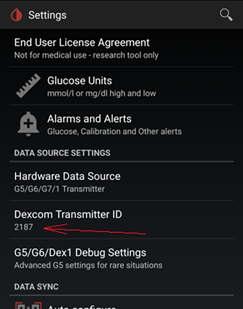
6- Enter the 4-digit pairing code from the sensor applicator as the transmitter ID.
7- Go to the Dex status page and wait for a connection.
If you’re using Android 10 or newer, approve the pairing request.
If the sensor was inserted more than 30 minutes ago, you should see readings. If it was just inserted, it will show as “warming up.” Over time, the status page will populate with additional data, including time remaining and other elements.
Once the Dex Status Page shows the battery voltages, you can enable your pump or receiver.